Worn, scratched hardwood floors with traffic patterns and color stains can make an entire home feel tired. Fortunately, most solid hardwood can be sanded and refinished back to like-new condition for a fraction of replacement cost. This guide to hardwood floor sanding and refinishing covers equipment, grit progression, staining, and finishes — everything needed for a professional-quality restoration.
Assessing Your Hardwood Floors
Before sanding, first confirm the floors are candidates: solid hardwood (or thick engineered with adequate wear layer) with no structural damage, deep pet stains that penetrate beyond sanding depth, or excessive previous sandings (check remaining wood above the tongue). However, floors with major water damage, widespread gaps, or less than 1/8 inch of sandable wood may need replacement instead.
Drum Sander vs Orbital Sander
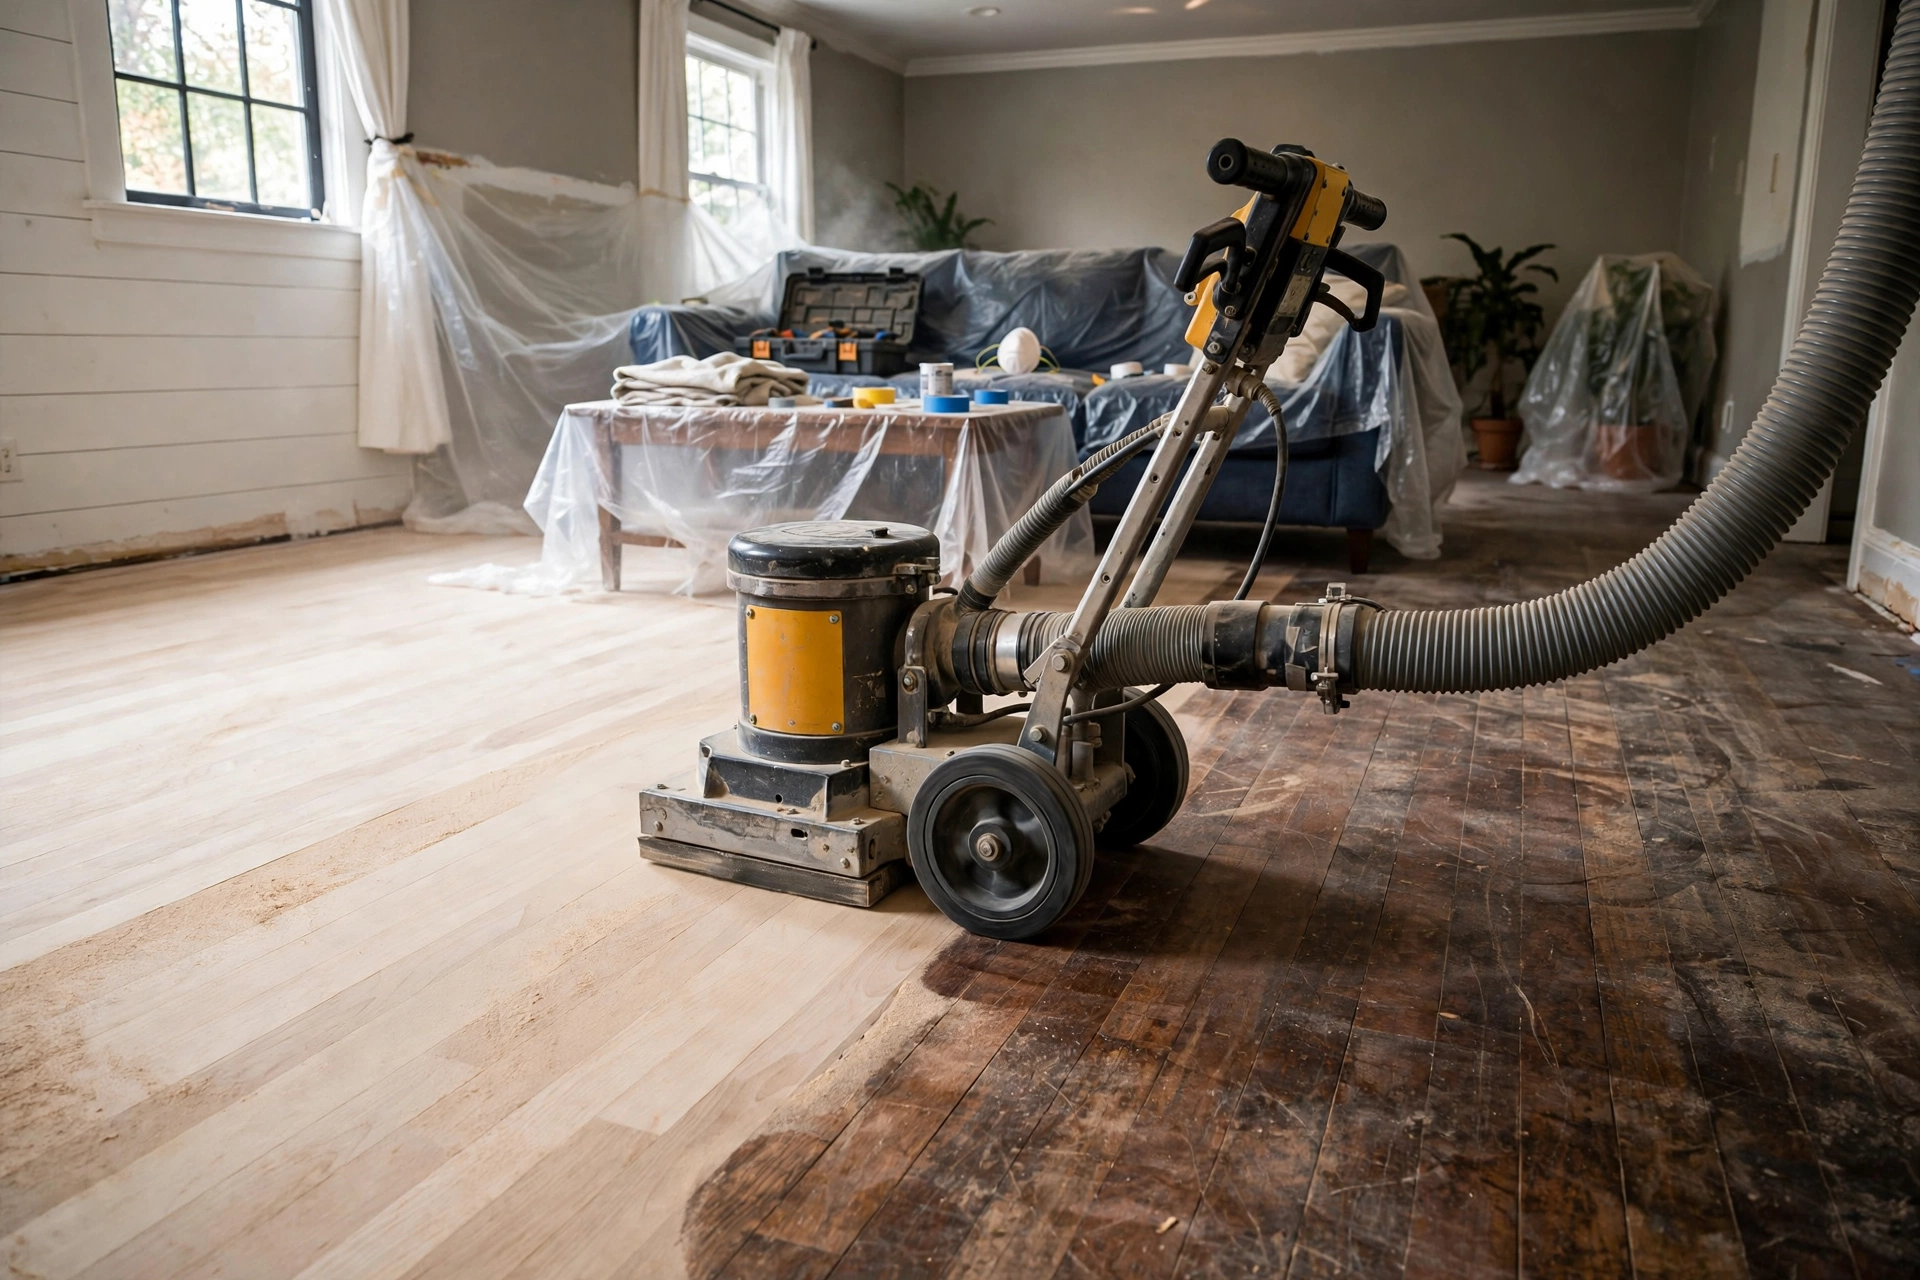
The workhorse of floor refinishing is the drum sander — aggressive, fast, and unforgiving. In contrast, random orbital sanders are slower but far more forgiving for beginners.
Drum Sander Technique
Drum sanders remove material quickly but will gouge the floor if allowed to sit spinning in one spot. Therefore, keep the machine moving at all times, lower the drum gradually, and maintain a steady pace with slight overlap on each pass. Professionals make it look easy; first-timers, however, should practice in a closet.
Orbital and Edge Sanders
Random orbital floor sanders remove less material per pass but virtually eliminate the risk of drum marks — a reasonable choice for thin or delicate floors. In addition, edge sanders handle the perimeter where the big machines can’t reach. Finally, detail sanders and scrapers finish corners and around trim.
Dustless Floor Sanding
Modern professional sanding uses dust-containment systems — sanders connected to powerful vacuums with HEPA filtration. Specifically, true dustless sanding captures the vast majority of dust at the source, making the process dramatically cleaner. Consequently, if hiring a contractor, confirm they use dust containment; if DIYing, rent the vacuum attachments and seal the work area with plastic.
Grit Progression for Floor Sanding
Proper sanding follows a strict grit sequence — skipping grits leaves visible scratches:
- 36–40 grit: removes old finish and levels the floor (the heavy cutting pass).
- 60 grit: removes 40-grit scratches.
- 80 grit: removes 60-grit scratches; the standard final sanding for stain-grade floors.
- 100 grit: final pass for natural (unstained) floors or extra-smooth stain application.
First, never jump more than one grit size between passes. Next, between each grit, vacuum thoroughly — leftover coarse grit under a fine belt creates deep scratches. Finally, after the final pass, buff with a maroon pad or screen for a uniform surface.
Wood Floor Staining Techniques
Stain adds color and evens out tone variations. First, apply with applicator pads or rags, working in manageable sections and maintaining a wet edge. Then wipe excess per the manufacturer’s timing — longer dwell means darker color. For best results, test the stain on a closet floor or sample board first; stain looks different on every floor. In short, for color stains and wear restoration, even application and proper prep determine the result.
Oil-Based vs Water-Based Polyurethane
The finish protects everything beneath it. The two main options:
Oil-Based Polyurethane
Rich amber tone that deepens over time, excellent durability, longer working time — but strong fumes, 8–24 hour dry times between coats, and it yellows noticeably. Typically 3 coats.
Water-Based Polyurethane
Crystal-clear finish that won’t amber, low odor, 2–4 hour recoat times — but slightly less rich-looking on dark stains and historically less durable (modern commercial-grade water-based finishes have largely closed the gap). Typically 3–4 coats.
Dry Times and Curing
Respect the dry times: recoating too soon causes adhesion failure; walking on floors too early mars the finish. Full cure takes 7–30 days depending on the product — therefore, treat floors gently during this period (socks only, no rugs, no heavy furniture).
Refinish Hardwood Floors: Cost Considerations
Professional refinishing typically costs a few dollars per square foot — dramatically less than replacement. On the other hand, DIY saves labor cost but requires equipment rental (drum sander, edger, buffer, vacuums) and carries real risk of drum marks or uneven stain. Consequently, for large areas or valuable floors, professional work usually pays for itself in quality.
Maintaining Refinished Hardwood Floors
- Use felt pads under all furniture legs.
- Clean with a hardwood-specific cleaner — never wet-mop or use steam.
- Place mats at entrances to trap grit (sand is finish’s worst enemy).
- Maintain indoor humidity between 35–55% to prevent gapping and cupping.
- Recoat (screen and apply one finish coat) every 3–5 years in high-traffic areas before wear reaches the wood.
Final Thoughts on Hardwood Floor Sanding and Refinishing
In short, hardwood floor sanding and refinishing rewards patience and process: honest assessment, correct equipment, disciplined grit progression, careful staining, and quality finish applied with proper dry times. Done right, 50-year-old floors look new — and stay beautiful for decades with simple maintenance.
Bring your hardwood back to life. Contact E and K Contractors for professional floor sanding and refinishing.
Frequently Asked Questions
How much does it cost to refinish hardwood floors?
Professional refinishing typically runs a few dollars per square foot depending on condition, stain, and finish choices — far less than replacement. However, DIY costs less but requires equipment rental and carries quality risks.
Drum sander vs orbital sander — which should I use?
Drum sanders are faster but can gouge floors if mishandled — best for experienced users. In contrast, random orbital sanders are slower but much more forgiving, making them safer for DIYers and delicate floors.
How many coats of polyurethane do hardwood floors need?
Typically 3 coats of oil-based or 3–4 coats of water-based polyurethane. However, each coat must dry fully before the next, and the floor needs 7–30 days for full cure depending on the product.
Can pet stains be sanded out of hardwood?
Surface stains usually can; deep stains that have penetrated through the wood fibers cannot be fully removed by sanding. Therefore, very dark, deep pet stains may require board replacement or a dark stain to blend them.
Oil-based vs water-based polyurethane — which is better?
Oil-based offers rich amber tone and proven durability with longer dry times and yellowing. Meanwhile, water-based stays clear, dries fast, and has low odor, with modern commercial grades approaching oil-based durability. Ultimately, choose based on your desired look and timeline.