Custom cabinetry is the centerpiece of most kitchen remodels — and the difference between cabinets that look built-in and cabinets that look bolted-on comes down to installation. Proper custom cabinet installation requires precise leveling, solid structural attachment, and careful trim work. This guide walks through the professional techniques contractors use to mount kitchen cabinets that stay level, plumb, and beautiful for decades.
Planning Your Custom Cabinet Installation
Before a single screw goes in, successful installation starts with planning. Measure the kitchen carefully, confirm the cabinet layout against the design drawings, and locate all wall studs, plumbing, and electrical runs. Consequently, careful planning minimizes surprises during installation and the work proceeds efficiently.
Laser Leveling for Perfect Cabinet Alignment
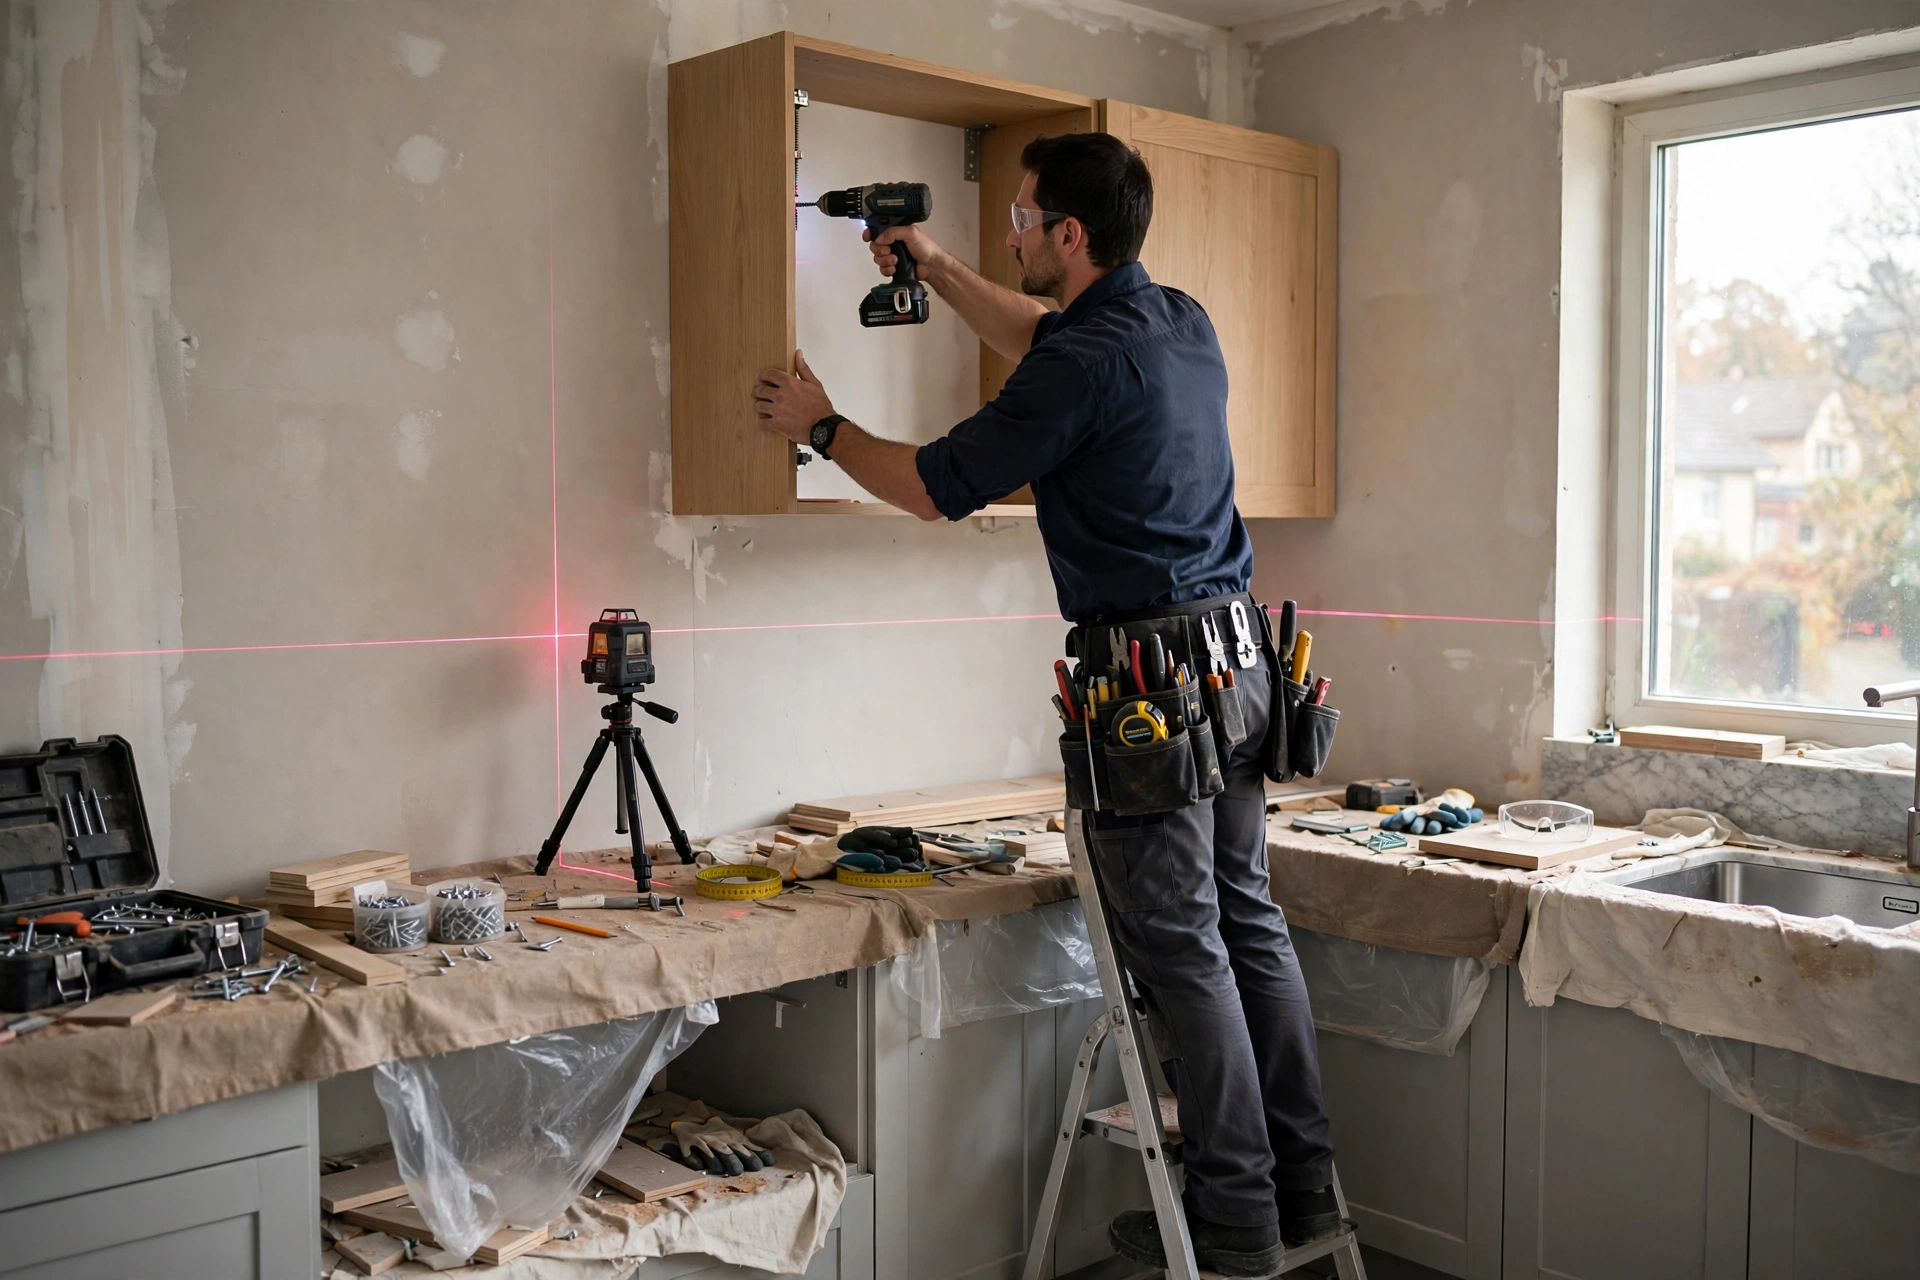
Professional installers rarely rely on a spirit level alone. A rotary or line laser level projects a perfectly horizontal reference line around the entire kitchen, ensuring every cabinet — uppers and lowers — aligns to the same datum.
Establishing the Reference Line
Find the highest point of the finished floor, then measure up to establish the base cabinet height (typically 34.5 inches plus countertop). After that, project the laser line at this height around the room. All base cabinets align to this line, which automatically compensates for uneven floors.
Leveling Upper Cabinets
Upper cabinets typically sit 18 inches above the countertop (54 inches from the floor). Project a second laser line at this height. As a result, every wall cabinet hangs at exactly the same elevation, creating the clean sightline that distinguishes professional work.
Wall Stud Locating and Structural Attachment
Kitchen cabinets — especially uppers loaded with dishes — are heavy. Anchor them into structural framing, not just drywall.
Finding and Marking Studs
Use an electronic stud finder to locate every stud along the cabinet run, then mark their centers clearly on the wall. In addition, verify with a finish nail probe where it matters — a misidentified stud means a cabinet secured to nothing.
Heavy-Duty Cabinet Screws
Professional installers use heavy-duty cabinet screws (typically #8 or #10, 2.5–3 inches long) driven through the cabinet’s hanging rail into the studs. Each upper cabinet should catch at least two studs. Therefore, plan the layout so cabinet stiles land near stud locations wherever possible.
Installing Upper Kitchen Cabinets
Secure Wall Cabinets Safely
Uppers go in before base cabinets — this keeps the work area clear and prevents damage to lowers. Use a cabinet jack, ledger board, or adjustable support pole to hold each cabinet at the laser line while you fasten it. Never try to hold and screw simultaneously; the risk of a dropped cabinet (or injury) is too high.
Shimming Uneven Surfaces
Walls are rarely perfectly flat or plumb. Place shims behind the cabinet at each screw location to bring the cabinet face plumb without bowing the cabinet box. After fastening, score and snap off excess shim material. Shimming is not a shortcut — it is the correct technique for uneven surfaces.
Kitchen Cabinet Leveling Techniques
Base cabinets must be level in both directions — along the run and front-to-back. Set the first cabinet (usually a corner or sink cabinet) perfectly level using shims under the base, then align each subsequent cabinet to it, clamping face frames together before screwing them to each other.
Dealing With Uneven Floors
On sloped or wavy floors, start at the highest point and shim everything else up to match. Cutting cabinet bases to follow a sloping floor is a last resort — shimming preserves the cabinet’s structural integrity and looks cleaner.
Crown Molding Trim Integration
Crown molding bridges the gap between upper cabinets and the ceiling, giving the kitchen a finished, furniture-like appearance.
Scribing and Fitting Crown Molding
Because ceilings are rarely level, scribe or shim the crown molding to follow the ceiling line while keeping it tight to the cabinet tops. Install a nailer strip behind the molding for solid attachment, cope inside corners for a tight joint, and fill and caulk for a seamless look.
Common Custom Cabinet Installation Mistakes to Avoid
- Skipping the laser: eyeballing level across a 10-foot run guarantees a visible wave.
- Anchoring to drywall only: uppers will eventually pull away — always hit studs.
- Ignoring the high spot: starting at a low point means cabinets that step down awkwardly.
- Overtightening screws: crushing the cabinet rail weakens the attachment; snug is enough.
- Forgetting utilities: plan cutouts for plumbing and electrical before cabinets go up.
When to Hire a Custom Cabinet Contractor
DIY cabinet installation is possible for simple layouts, but custom cabinetry — with its tight tolerances, scribing, and trim integration — rewards professional experience. A qualified general contractor coordinates the cabinet installation with countertops, plumbing, and electrical for a seamless remodel. If your project involves structural changes too, review our guide to structural remodeling services before work begins.
Final Thoughts on Custom Cabinet Installation
Great cabinet installation is invisible — you notice only the result: doors that align, drawers that glide, and trim that looks original to the house. Laser leveling, proper stud attachment, careful shimming, and integrated crown molding are the techniques that get you there.
Planning a kitchen remodel? Contact E and K Contractors for professional custom cabinet installation done right the first time.
Frequently Asked Questions
How long does custom cabinet installation take?
A typical kitchen takes 2–4 days for installation alone, depending on the number of cabinets, complexity of trim work, and site conditions. Custom pieces with intricate molding take longer.
Should upper or base cabinets be installed first?
Upper cabinets first. This keeps the work zone clear, prevents damage to base cabinets, and makes it easier to maneuver heavy wall cabinets into position.
What screws should be used for hanging kitchen cabinets?
Heavy-duty #8 or #10 cabinet screws, 2.5–3 inches long, driven through the cabinet hanging rail into wall studs. Each upper cabinet should be secured to at least two studs.
How do you level cabinets on an uneven floor?
Find the floor’s highest point, establish a level reference line with a laser, and shim all cabinets up to that line. Never cut cabinet bases to follow a slope unless absolutely necessary.
Can I install custom cabinets myself?
Simple stock-cabinet layouts are DIY-friendly, but custom cabinetry with scribing, integrated trim, and tight tolerances benefits greatly from professional installation — mistakes in custom work are expensive to fix.